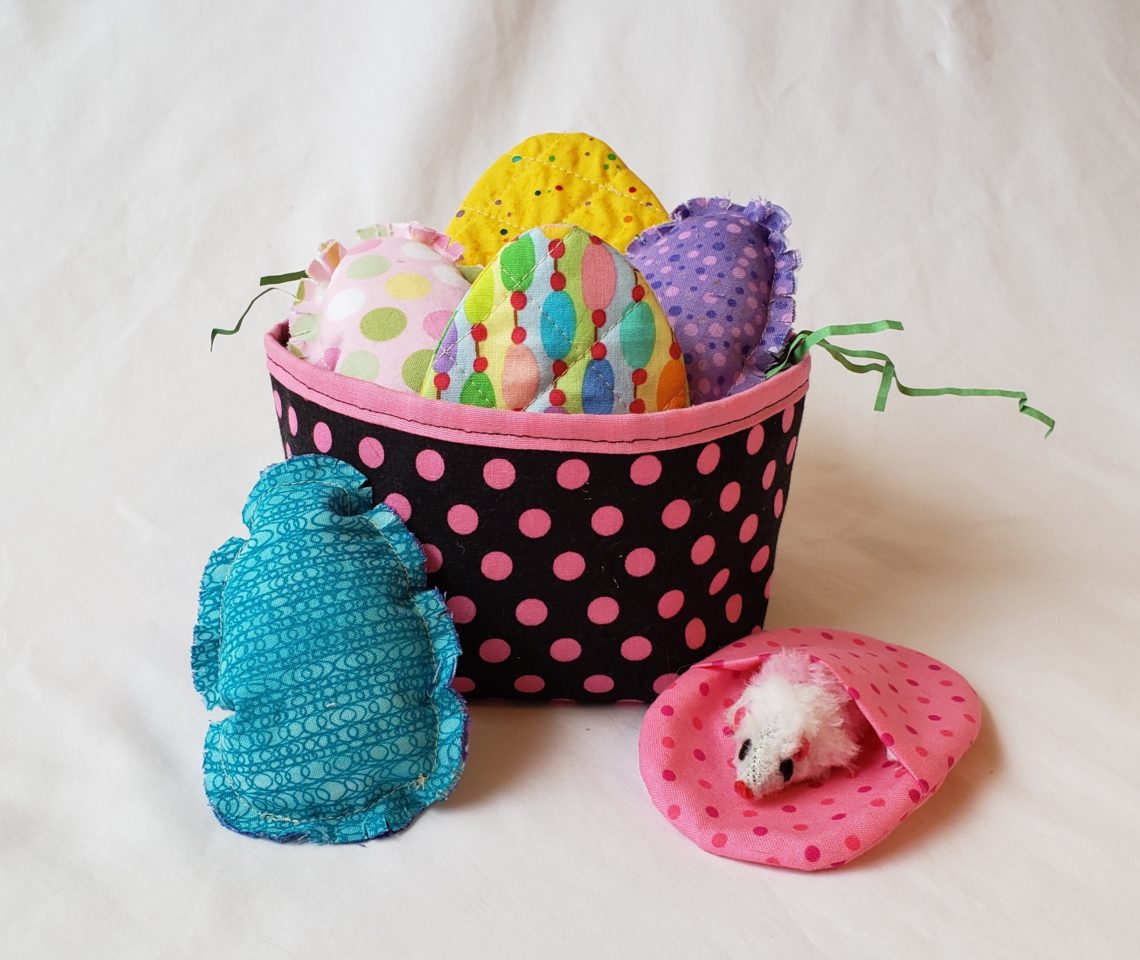
How to Make Fabric Easter Eggs with a Pocket for Treats
Are you ready for Easter? We are excited for the fun egg hunts and sweet treats here at my house! I made a few fabric eggs and the kids have had fun playing with them and hiding them. Then I thought how fun it would be to be able to hide a treat in them like plastic eggs. So I headed to the drawing board and made some cute little quilted eggs that have a pocket in the back. I’m really excited about how they turned out! They are perfect for sneaking a little toy or treat in. And I love that they will be reusable year after year. Yay for being green!

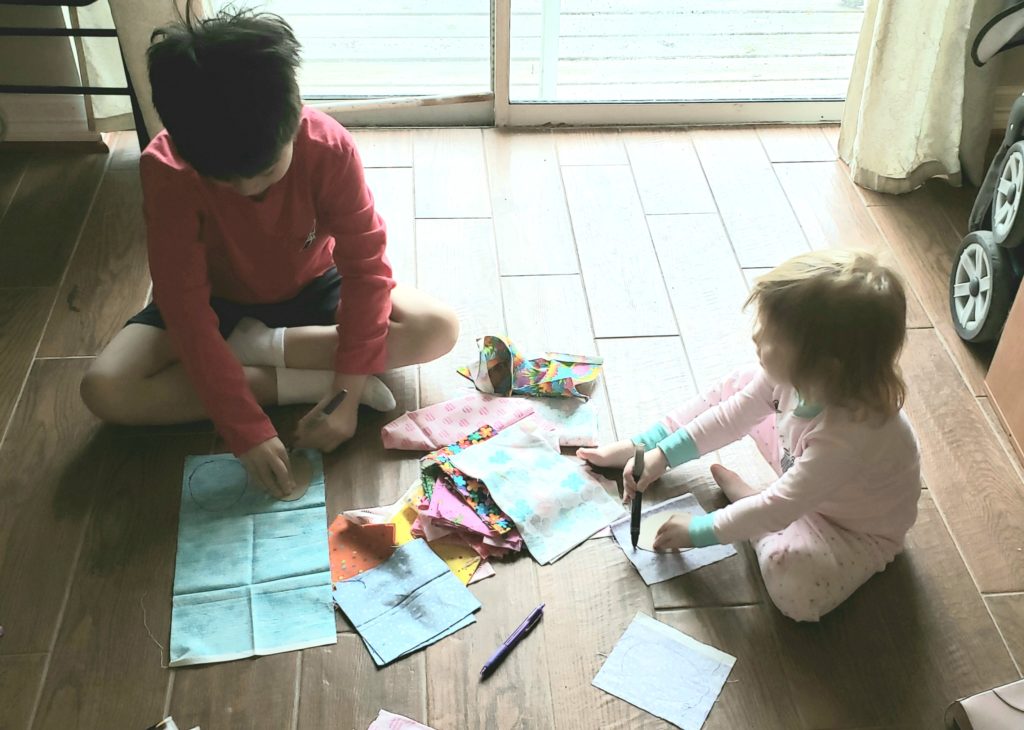
I also had some excellent help! My helpers picked out the fabric and traced the egg pattern on some of the eggs. Now don’t be too impressed…this little moment didn’t last very long! But it was sweet while it lasted. ☺️
These fabric eggs are super easy to make and great for using up your scraps.
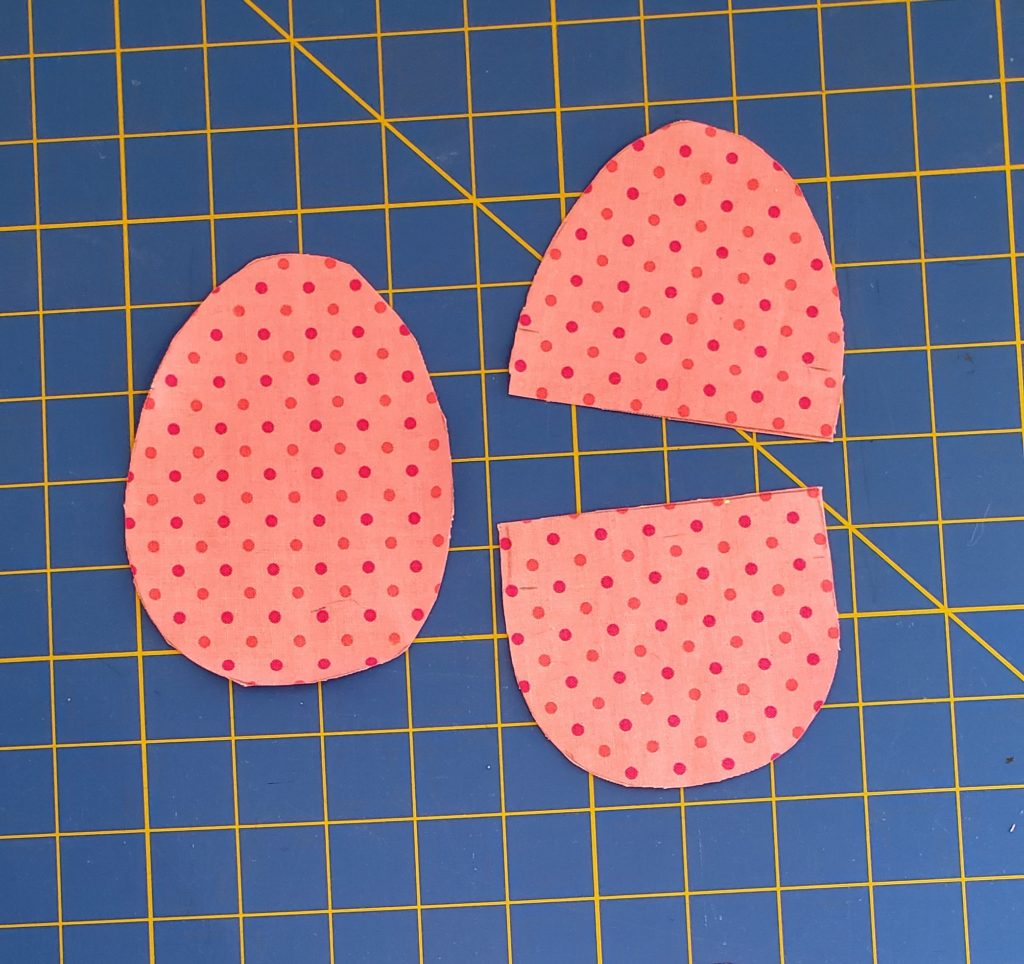
First, I cut out an egg shaped pattern (You can tell the kids used it first. 😀) and traced onto fabric. I cut out two eggs from my chosen fabric and one from a piece of batting.
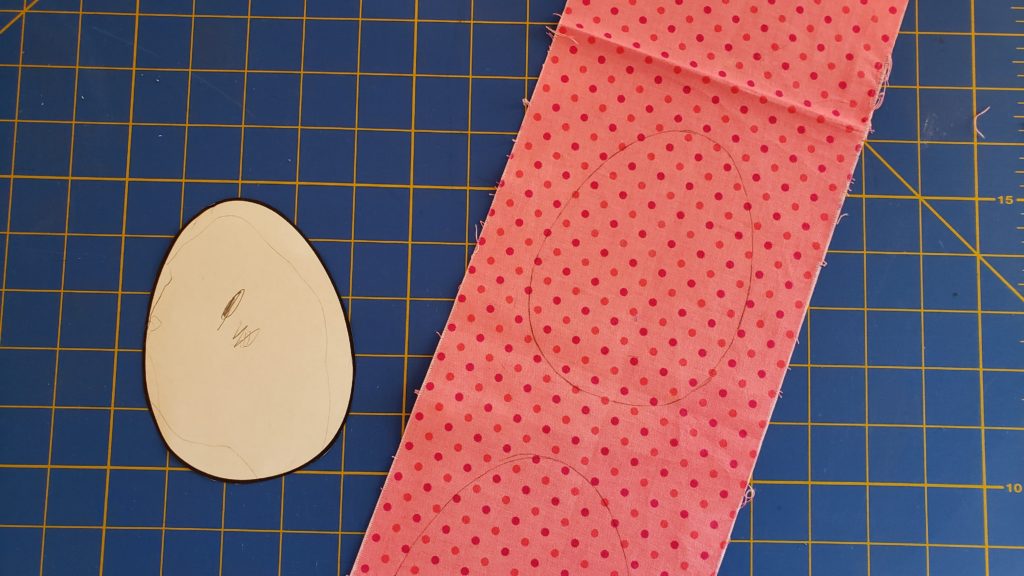
To create the pocket on the back, I cut an egg pattern across the middle and then extended the edge about a half inch on each side. So my pattern looked like this:
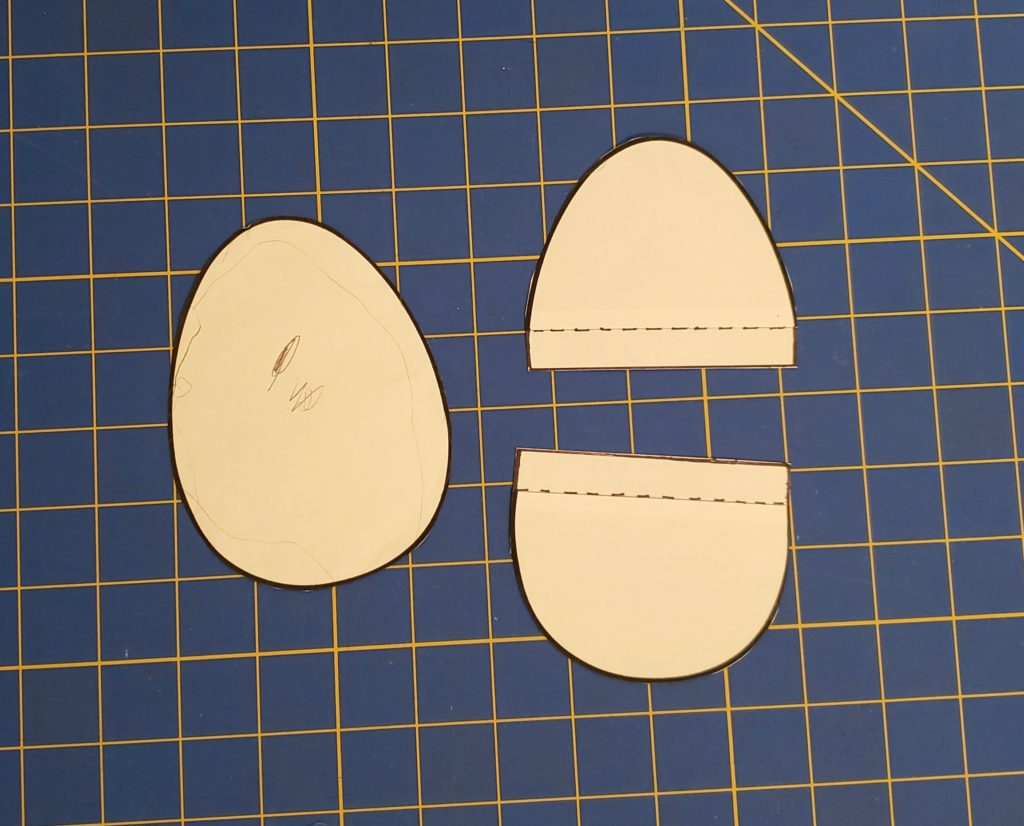
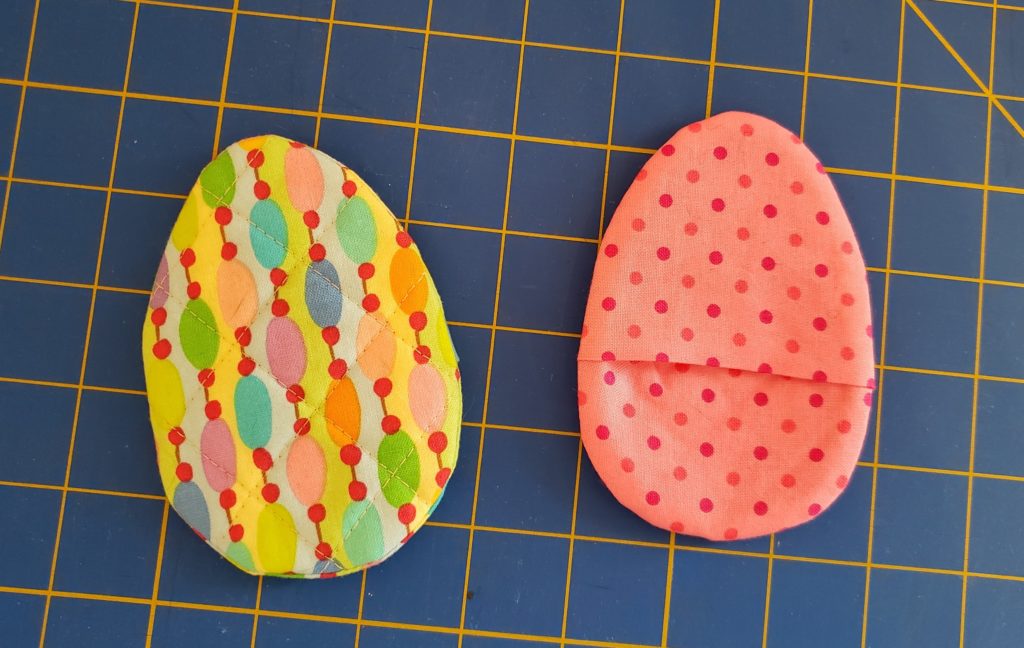
And my fabric pieces looked like this:
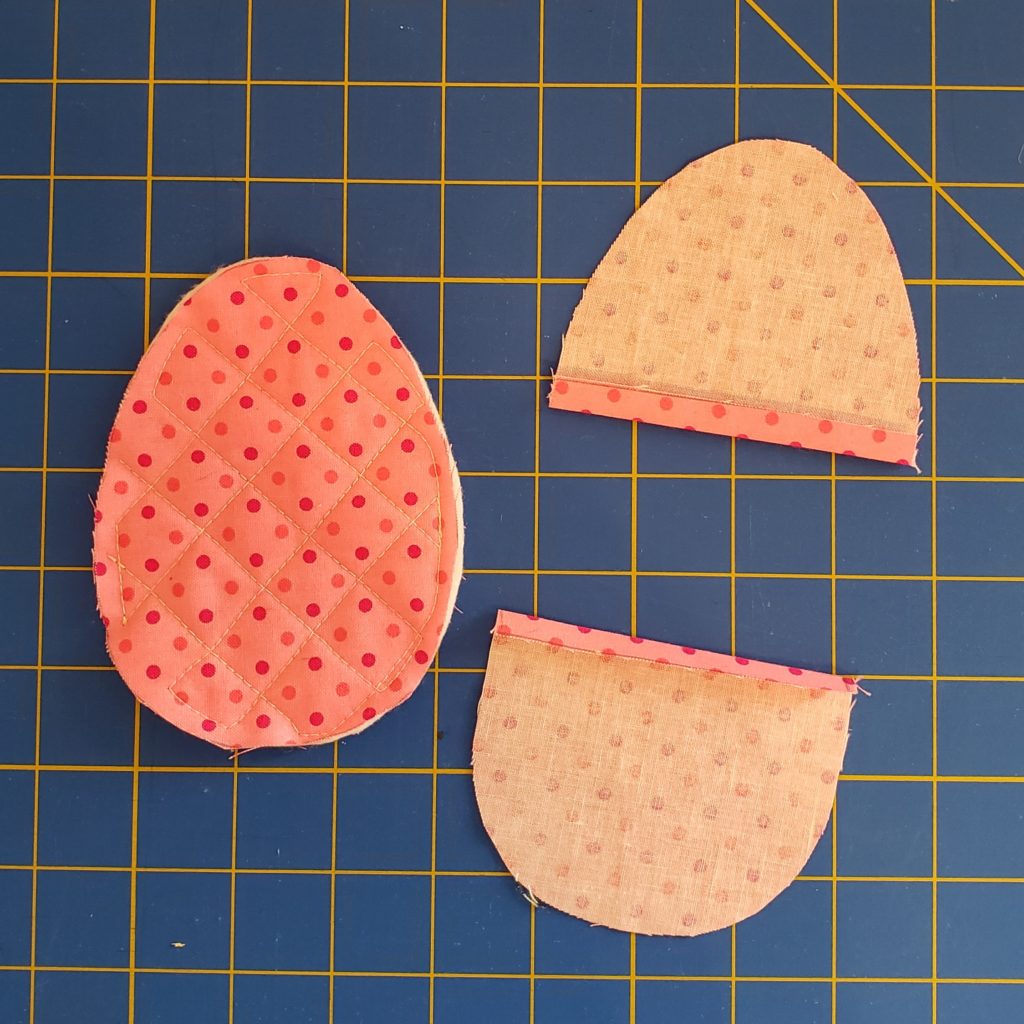
I layered the batting and egg-shaped fabric and quilted those together to make the front of the egg. You probably don’t have to add that step but it does add structure to the egg. I had a needy toddler who was sitting in my lap most of that step so I didn’t get any pictures of that. 🙄
Next, I folded and pressed the straight edges of the egg backs under about 1/4 inch. The edges should overlap some when they are layered together.
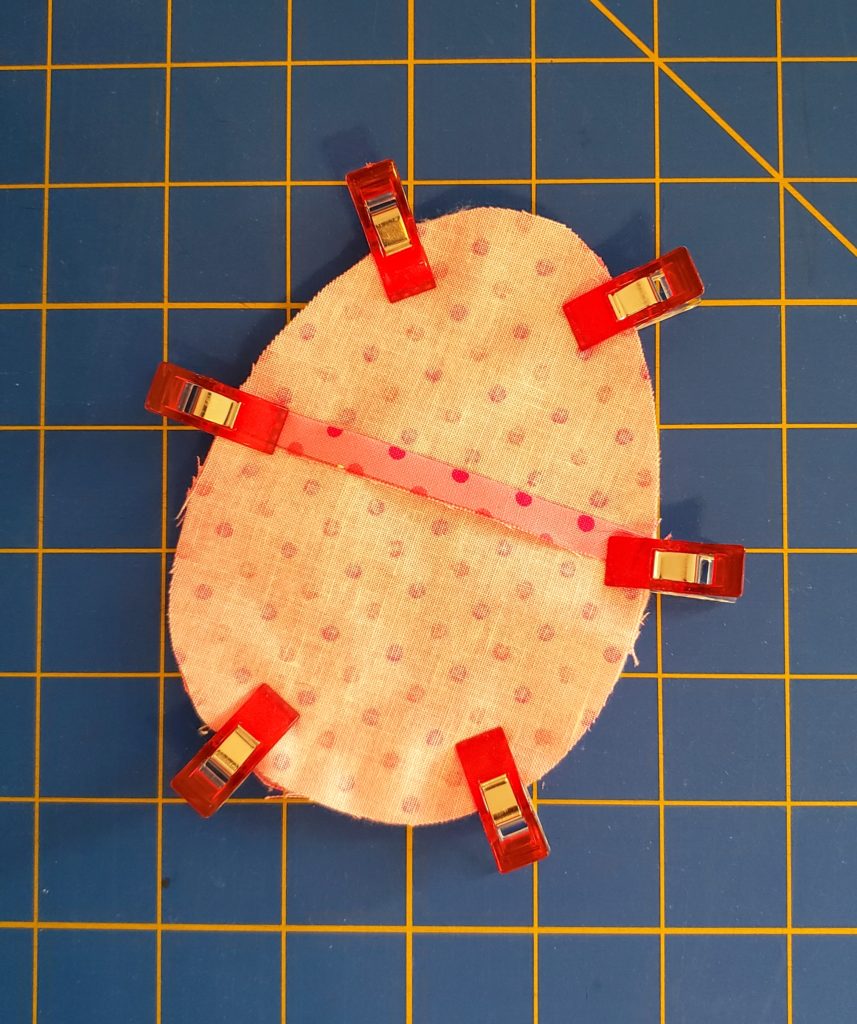
I layered the quilted egg and pieces of the egg back with right sides together. Then I sewed a 1/4 inch seam around the entire edge of the egg.
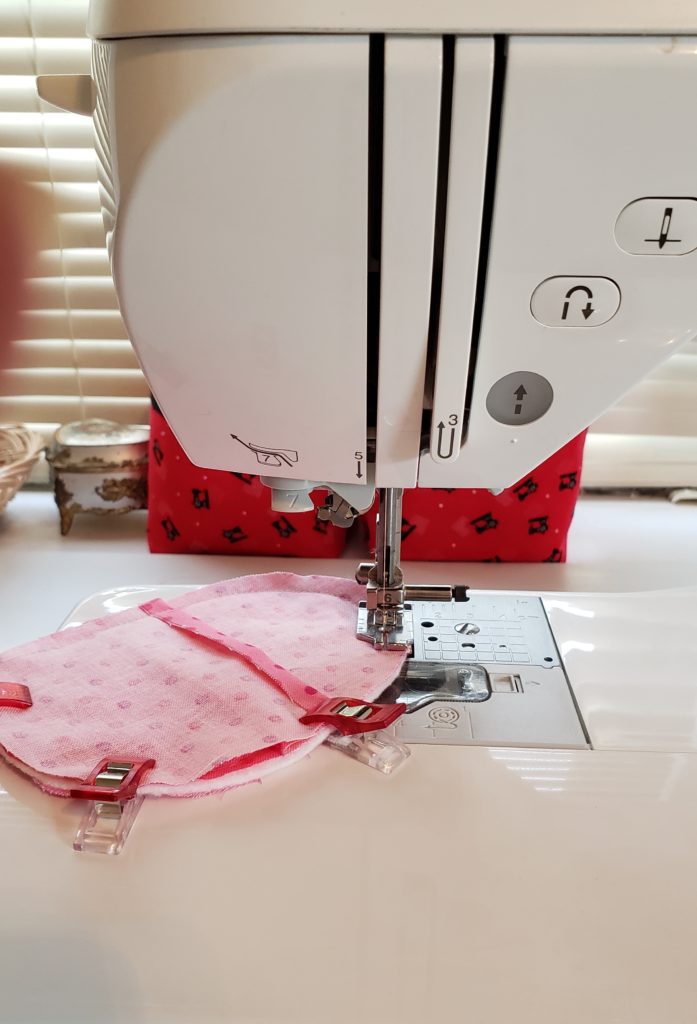
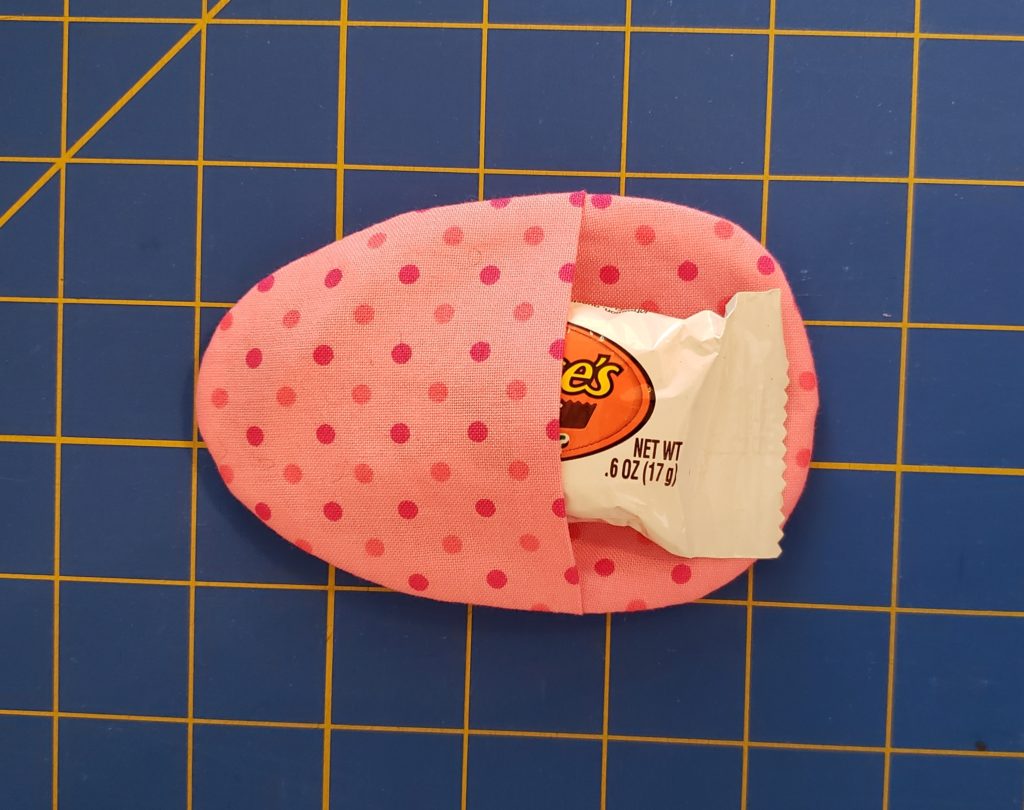
I trimmed a little of the batting so that the seam wasn’t quite so bulky. Finally, I turned the egg inside out through the open back and pressed the egg. Voila! A fabric egg with a pocket for treats!
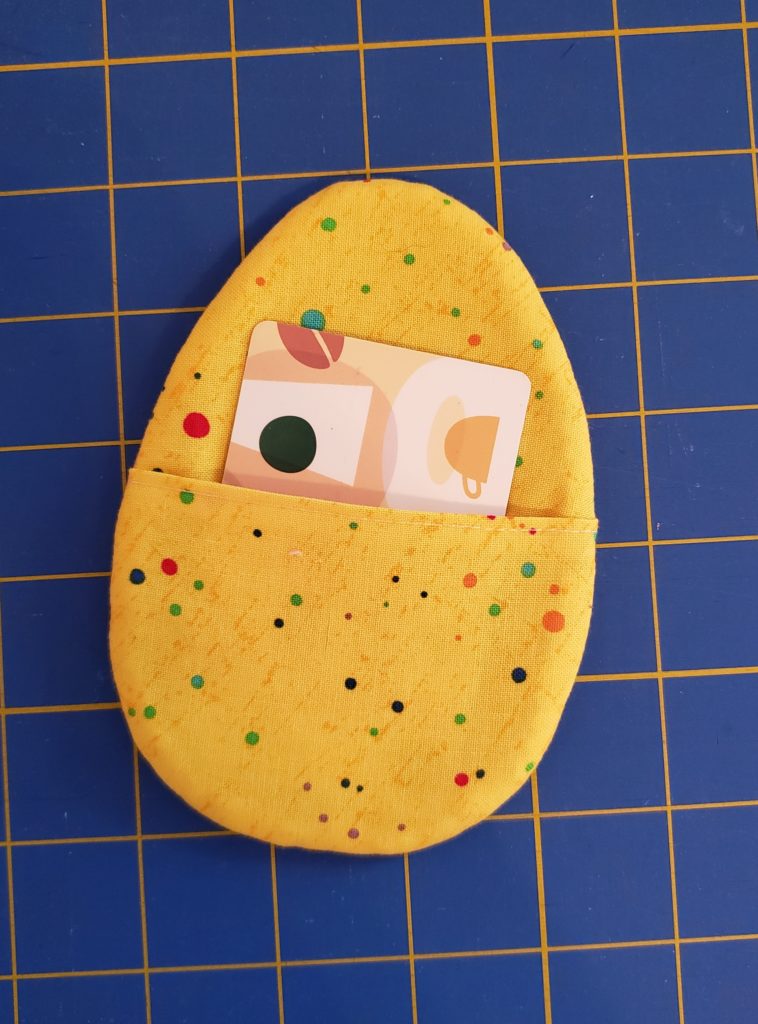
I also made one slightly bigger so that a gift card would fit inside. I thought this would be perfect for a teacher gift or maybe a basket for a teenager.
I hope you enjoy making these cute eggs as much as I did! I can’t wait to fill them with sweet treats and surprise the kids with them.
Happy Easter!!